
にほんブログ村
こんにちは、わくほこ(@wakuhoko)です。
今回はGASを使ってスプレッドシートに値を書き込む方法をご紹介します。
具体的には、
- すでにあるスプレッドシートから値を取得し、別のスプレッドシートへ書き込む
という処理になります!
自分メモなので、もし「もっと良い方法があるよ!」などありましたら、ぜひ教えてください。
コードを書く前の準備

コードを書く前に事前に確認しておいて欲しい点が2点あります。
- GAS(Apps Script)の開き方
- 権限の確認
GASの開き方はこちらの記事を参考にしてみてください。
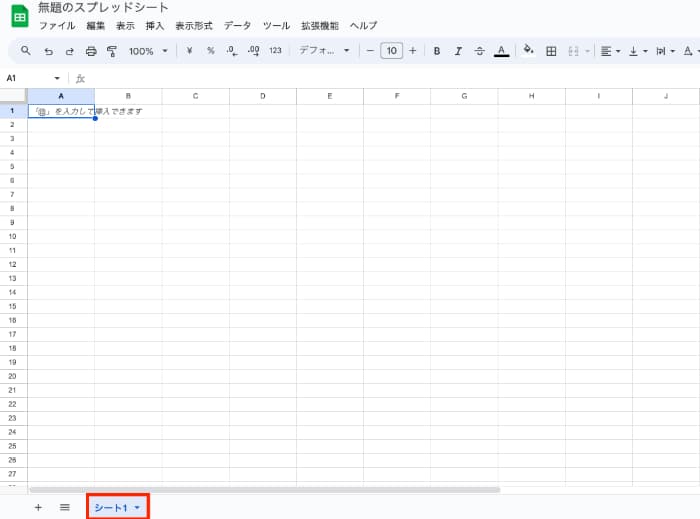
スプレッドシートの右上の「共有」ボタンからアカウントに編集権限を付与できます。

コードを書いてみよう!
それでは実際のコードです。
function myFunction() {
  //書き込み先スプレッドシートの取得
  const fileId     = "書き込み先のスプレッドシートのID";
  const fileObject =  SpreadsheetApp.openById(fileId);

  //書き込み先スプレッドシートのシート名を取得
 const fileSheet = fileObject.getSheetByName("シート名");

  //コピー元スプレッドシートのシート名を取得
 const orgFile = SpreadsheetApp.getActiveSpreadsheet().getSheetByName("コピー元シート名");

 //値が存在するすべてのセルの値を取得
  const orgData = orgFile.getDataRange().getValues();

 //書き込み先スプレッドシートの1行目1列目から書き込み
  fileSheet.getRange(1, 1, orgData.length, orgData[0].length).setValues(orgData);
}
コードの解説

まずは3行目のconst fileId = "書き込み先のスプレッドシートのID";というコード。
これは値の書き込み先のシートidを取得しています。
“https://docs.google.com/spreadsheets/d/XXXXXXX/edit?hl=ja#gid=0″
スプレッドシートのURLの「XXXXXXX」の部分をコードの書き込み先のスプレッドシートのIDに入力してください。
4行目のSpreadsheetApp.openById(fileId);では取得したidを元に書き込み先のスプレッドシートを指定して取得しています。
getSheetByName()は引数にシート名を指定することで、シートを取得することができます。
例えば、「シート1」という名前のシートを取得したければ、getSheetByName("シート1");となりますね!

余談ですが、スプレッドシートのシートってややこしいですよね…
SpreadsheetApp.getActiveSpreadsheet();ではコピー元のスプレッドシートを取得しています。
.getSheetByName("コピー元シート名")とすることでコピー元のスプレッドシートのシート名を指定することができます。
getActiveSpreadsheet() は今開いているスプレッドシートとGASが紐づいている場合に使えるメソッドです。
orgFile.getDataRange().getValues();では、getDataRange()で値が存在する範囲を、getValues()で指定した範囲の値を取得しています。

今回はコピー元のスプレッドシートから存在する値をすべて取得しています!
最後のgetRange(1, 1, orgData.length, orgData[0].length)ではコピー元のスプレッドシートのどこからどこまでの値を取得するかを指定しています。
getRange(何行目の,何列目から,何行目の,何列分)
の値を取得するかを指定しています。
setValues();は複数のセルに値を入力することができるメソッドです。
今回は引数にコピー元のスプレッドシートから取得した値を指定しています。
デバッグしてみよう!

せっかくなのでorgData.lengthとorgData[0].lengthの値を見てみましょう!
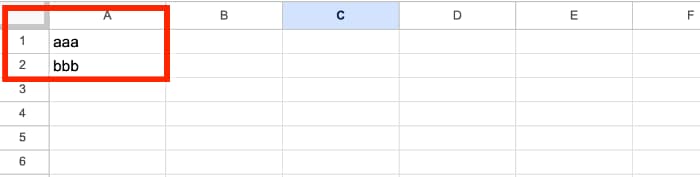
コピー元のスプレッドシートが以下のようになっているとします。
A列の1行目に「aaa」、A列の2行目に「bbb」という値が入っています。
//書き込み先スプレッドシートの1行目1列目から書き込み
  fileSheet.getRange(1, 1, orgData.length, orgData[0].length).setValues(orgData);
  Logger.log(orgData.length)
  Logger.log(orgData[0].length)
コードの最終行に2行付け足してGASを実行します。
するとログに以下のように表示されます。

つまり、
getRange(1, 1, orgData.length, orgData[0].length)はgetRange(1, 1, 2, 1)と指定しているのと同じ意味になります。
lengthを使うことでデータの数だけスプレッドシートに書き込むという指定をしているんですね!

getRange()メソッドで値を入力する範囲を指定して、setValues()メソッドで何の値を入力するかを指定しているってことか!
GASを実行してみよう!

さて、コードが書けたところでGASを実行してみましょう!
こちらの記事を参考にGASの「実行」ボタンを押します。
「権限を確認」ボタンを押します。

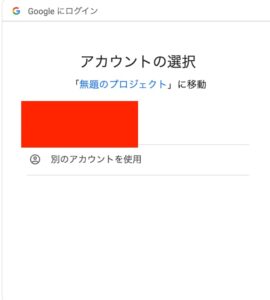
「アカウントの選択」で実行するアカウントを選択します。
もし以下のような画面が表示されたら、「詳細」をクリックしてください。
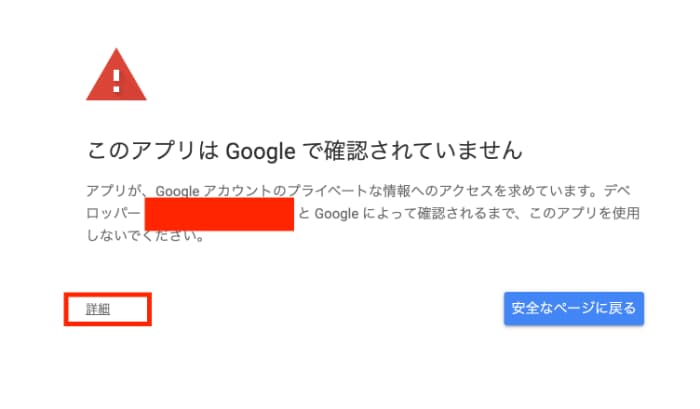
「安全ではないページに移動」を選択します。

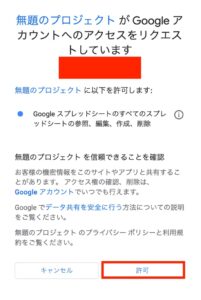
アカウントへのアクセスを許可します。
これでGASが実行できるはずです!

コピー元のデータがコピー先のスプレッドシートに反映されていることを確認してみてくださいね!
おまけ:参考
わたしは最初に以下の本でGASを勉強しました!
正直、調べながら実際にコードを書くのが1番勉強になります。
が、「GASって何ぞや??」というところから詳しく解説されているので理解が深まります◎
終わりに
今回はGASですでにあるスプレッドシートから値を取得し、別のスプレッドシートへ書き込む方法をご紹介しました!
setValues()メソッドがめちゃくちゃ便利だなと思いました。
以前書いた以下の記事もsetValuesメソッドでリファクタリングできそうな気がします。
まあ、それはおいおいということで…
今回の記事がどなたかの参考になれば幸いです!
以下ではGASでGmailに届いた問い合わせを自動でスプレッドシートに転記する方法をご紹介しています。

また、スプレッドシートの関数を使って動的に値を表示させる方法もご紹介しています。

こちらもよければ参考にしてみてください!
ではでは〜
にほんブログ村